How to check and monitor your hard drive’s health
Of all the PC components, few require more care and attention than a hard drive. We’ve all heard the admonishments to defragment drives, and clean up junk files to keep all our 1s and 0s sparkling. No matter how well you care for it, however, at some point that drive is going to fail. Sometimes you can hear it coming, sometimes it happens suddenly in the middle of a project, and other times it just refuses to boot one morning.
Whatever way your hard drive meets its end, it’s a certainty you’ll see it happen if you use a PC long enough.
Hard drives are complicated little devices. The primary components are the magnetic platters that contain the data, as well as the head that reads and writes the data. Those moving parts are the great benefit and big flaw of your hard drive. One ill-timed drop of a laptop, or a sudden move of a desktop tower, and the drive can be irreparably damaged. Wait long enough, however, and the drive will just fail on its own—a pair of recent studies discovered that if a hard drive dies, it does so within three years. Moving parts always die in time.
That’s why hard drives need closer monitoring than a solid state drive, which has no moving parts. They die too, but usually not under the same conditions. If you’re thinking about using an SSD as your primary boot drive, check out our roundup of the best SSDs.
While you can’t always predict when or how your hard drive will bite the dust, you can take a few steps to see it coming.
Get SMART
The first tool for keeping tabs on a hard drive is its Self-Monitoring, Analysis, and Reporting Technology, or SMART, feature. This system is built into most modern hard drives and SSDs, and it’s designed to report when your drive is failing or encountering issues. Drive manufacturers can take their own approaches to SMART, but they generally measure similar performance points such as read error rates, mechanical shock, hard disk temperature, seek time performance, and so on.
Most of the time the SMART system works in the background, but you can bring it to the fore in a number of ways.
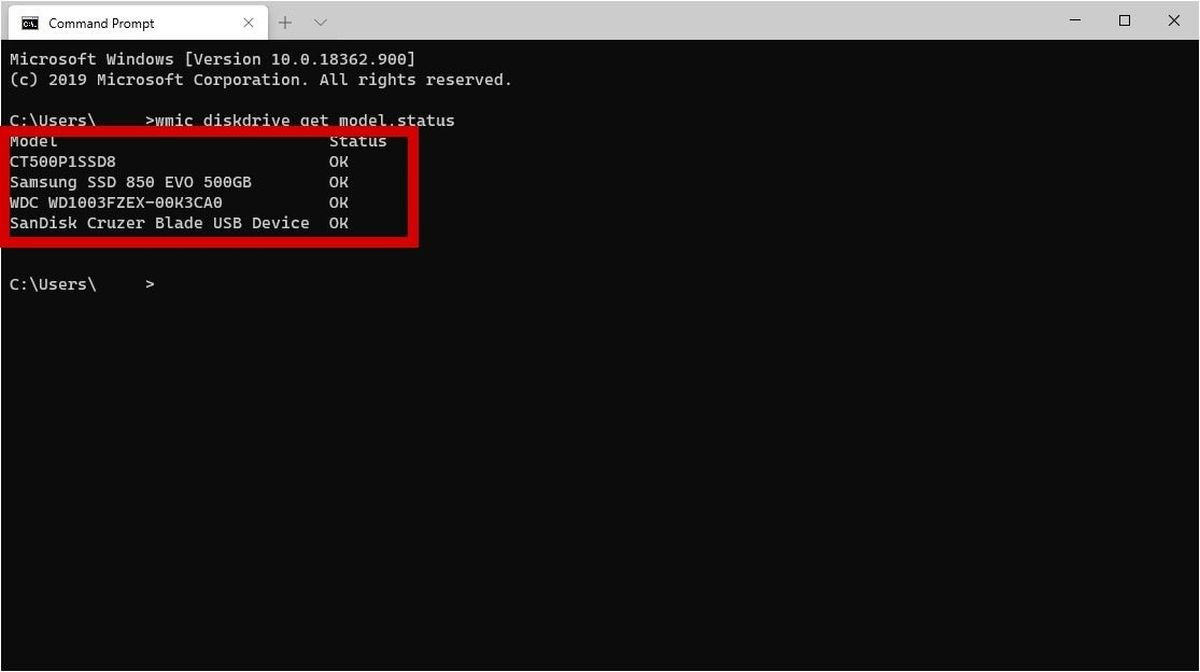
The simplest way is to use the Windows command line utility WMIC, which stands for Windows Management Instrumentation Command-line (utility). This basic tool is a simple yay/nay health result based on the SMART statistics. Open a Windows command prompt and enter the following: wmic diskdrive get model,status.

Ian Paul/IDG
The results should look something like the image here. It’s preferable to ask for the model as well as status so that you can determine more quickly which drive is failing if a problem is reported. This is not so much an issue for laptops, but it’s helpful for desktops with multiple drives.
CrystalDisk Info
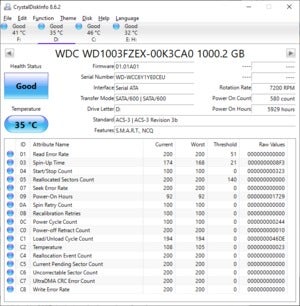
If you’d like something with a little more detail then another option is to use CrystalDisk Info. CDI is a free desktop program that can display a lot of information about your disks, but the top area is probably enough for most people. (CDI is also wonderful for seeing your SSD’s hidden stats.)
Here, CDI displays a status for each drive using a color-coding system: Good (blue), Caution (yellow), Bad (red), and Unknown (gray). Most of the time you should just see a Good status, but if you see one of the others it’s time to keep an eye on that drive.
But here’s the thing about checking the SMART status: It’s not 100-percent reliable. Consider a Google study published in 2007: The authors found that 36 percent of the drives monitored for the study reported no SMART issues at all before failing.
Things haven’t changed much either. In 2016, Backblaze reported that it was seeing 23.3 percent of its data center drives failing without reporting issues from the five SMART attributes it tracks.
Statistically speaking the majority of discs do report SMART issues before failing; however, statistics become less reliable when trying to predict the fate of a single drive. In other words, your particular drive might report issues before failing, or it might not.
SMART is also a part of SSDs, but it has the same drawbacks and limitations as hard drives. The best solution right now for SSDs is to use monitoring tools provided by the drive maker such as Crucial’s Storage Executive, WD’s SSD Dashboard, or Samsung’s Magician Software.
Beyond SMART

HDD interiors almost resemble a high-tech record player.
While SMART is a useful tool for monitoring your drive’s health, you should also keep an eye on how your drive behaves and sounds. If you start to hear a grinding noise emanating from your PC, for example, that is mostly likely the hard drive. Either its end is near, or it’s going to start malfunctioning soon.
Even if you don’t hear a funny noise, your drive can cause odd things such as frequent crashes, a high number or error messages, folder or file names that have odd characters in them, very sluggish performance, or documents suddenly filled with garbage. Most of these issues are a pretty clear sign your drives are about to end, but not always.
First, check to see if your storage device drivers are up to date. This is a good basic step for any component, and it may improve your storage drive’s performance if you’re encountering issues.
If a driver update doesn’t help, run Windows’ built-in ‘chkdsk’ (check disk) command-line utility. For those looking to take extra care, run it every few months, at the start of each quarter, for example.

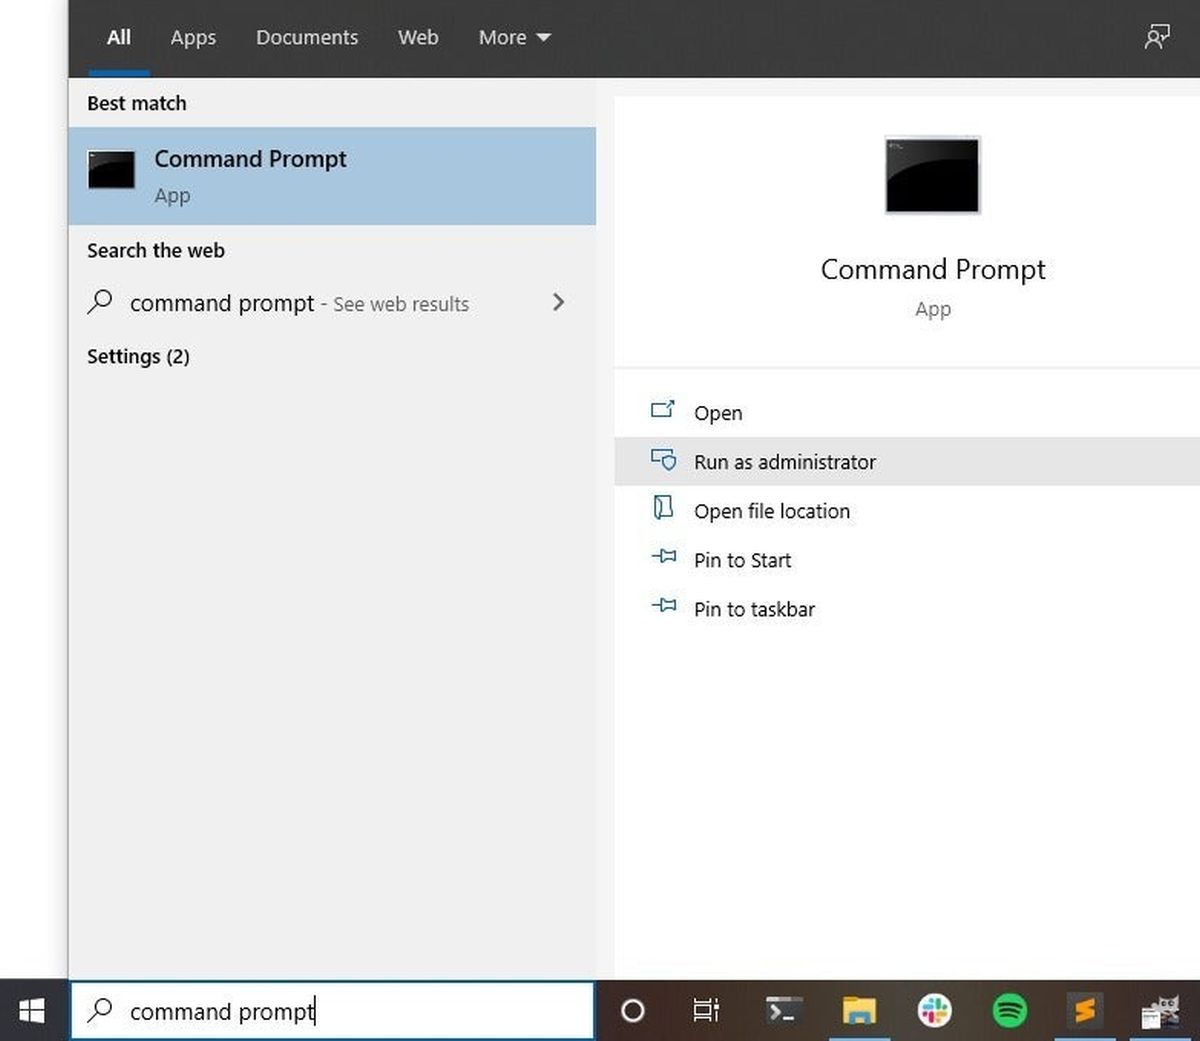
Run the command prompt as an administrator to use ‘chkdsk.’
Ian Paul/IDG
’Chkdsk’ runs only with elevated privileges. To do this, search for command prompt in the Windows 10 or 11 search box, and then select Run as administrator from the options as pictured here.
To just check the status of all your drives type chkdsk for a read-only status of your drives. If you want it to fix problems you need to run the check disk program with the /F or /R options. The /F option focuses on fixing filesystem errors, while the /R option also checks for bad physical sectors on the drive—don’t use the /R option on an SSD as this option is not built for solid state drives. The /R option can take a very long time to complete, and needs to work on a reboot so only run that when you have the time. The /F option also needs a reboot to run but requires less time.
An example command might be chkdsk d: /r. That command tells the utility to check only your D drive. In this scenario the C: drive is an NvME SSD and D: is the higher-capacity hard drive that requires servicing.
Windows is set to run chkdsk automatically, so you may be alerted to issues before you do a manual run of this utility.
Life after death
To avoid the worst effects of dying storage drives, make sure you’re doing regular backups. The best option is to use something that saves multiple historical states of your data such as Windows’ built-in File History. That way if a recent backup has the same garbage drives, you can go back in time to retrieve earlier versions of them. If you don’t like File History check out our tour of the best Windows backup software, as well as our round-up of the best external drives to store your backups.
It’s also a good idea to use a cloud backup service so you have a third copy of your data that’s offsite. An alternative would be to have two hard drives doing File History backups, and keeping one offsite, with regular swaps to keep each drive as current as possible.
Once you start seeing serious hard drive errors that can’t be fixed with check disk, it’s time to replace the drive as soon as possible, ideally with an SSD if possible. If the errors can be fixed, you can probably eke a little more life out of the drive, but it’s still a good idea to replace it and avoid further heartache.
For all the latest Technology News Click Here
For the latest news and updates, follow us on Google News.

