Here’s How To Screen Record On Your MacBook With Sound
To begin capturing footage of your MacBook’s screen using keyboard shortcuts, you’ll first need to trigger Apple’s Screenshot toolbar and follow these steps (via Apple).
1. Press the Shift + Command + 5 keys together. This should pull up the screen record controls onscreen.
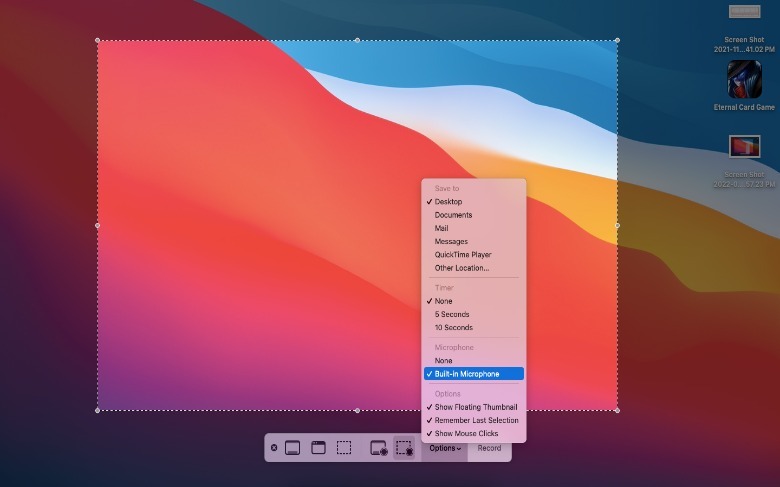
2. Click “Options” and pick where you want your screen recordings to be saved (Desktop is selected by default).
3. Pick any option under “Timer” and keep “Show Mouse Clicks” checked if needed. If you’d like to speak while recording your screen and have it included in the finished product, make sure you select “Built-in Microphone” under “Microphone.”
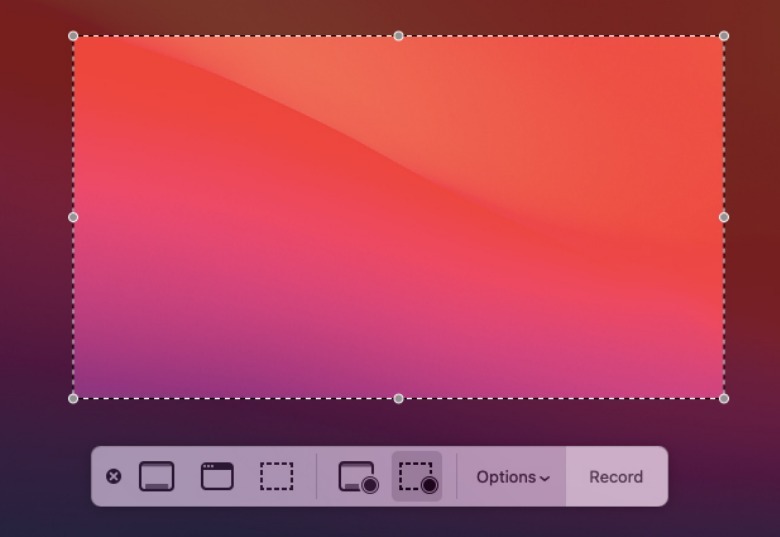
4. Pick a screen record mode to use. There are various options, including buttons to take still-image screenshots of your screen or a selected section. However, for the purposes of screen recording with audio, choose either “Record Entire Screen” or “Record Selected Portion.”
5. To record your entire MacBook screen with sound, click the fourth icon (window with record button). This will turn the cursor will turn into a camera.
6. Click anywhere on the screen or hit “Record” on the toolbar to initiate the recording process.
7. To record a section of your MacBook screen with sound, click the fifth icon (marquee box with record button). Drag the marquee box around the screen portion you’d like to capture then hit “Record” on the toolbar to begin.
8. To stop screen recording, hit the stop icon on the toolbar above or press the Command + Control + Esc keys together. The video recording file should appear in the location you selected previously under “Options.”
For all the latest Games News Click Here
For the latest news and updates, follow us on Google News.


