
Jack Wallen walks you through the simplest way to deploy the eGroupware platform, so your small business can enjoy a powerful, in-house groupware suite.

Image: Mark Agnor/Shutterstock
If your small business is looking for a groupware suite, and you’d rather keep it within your on-premises data center, you have several options. One such option is eGroupware, a tool that began its life in 2000 as phpgroupware, based on webdistro. Since then, the platform has evolved into a full-featured groupware suite that includes:
-
Email
-
Calendar
-
Address Book
-
Timesheet
-
Tracking
-
File Manager
-
Bookmarks
-
News
For any small business, eGroupware might be a great tool to use as an internal suite of tools that could serve your staff needs with ease. Even better, deploying eGroupware isn’t nearly as complicated as you might think. With a running instance of VirtualBox, you can use the official UCS eGroupware appliance and have eGroupware up and running in under an hour—which is mostly dedicated to updating the software.
I want to show you how to deploy eGroupware as a virtual machine, using VirtualBox.
SEE: Kubernetes: A cheat sheet (free PDF) (TechRepublic)
What you’ll need
To get the most out of eGroupware, you’ll need the following:
Although you can deploy eGroupware without a domain, you’ll have to manage all users directly within eGroupware. That’s not a challenge, but if your business already uses either a UCS or Microsoft Active Directory Domain, it’s best to join the deployment to that domain. Also, if you wish to make use of the email component and email alerts, you will have to have a Fully Qualified Domain Name for the deployment.
How to deploy eGroupware
Open VirtualBox and click File | Import Appliance. Click the file choose and navigate/select the .ova image file you downloaded earlier. Click Next and you will be prompted to check the default settings for the appliance (Figure A).
Figure A
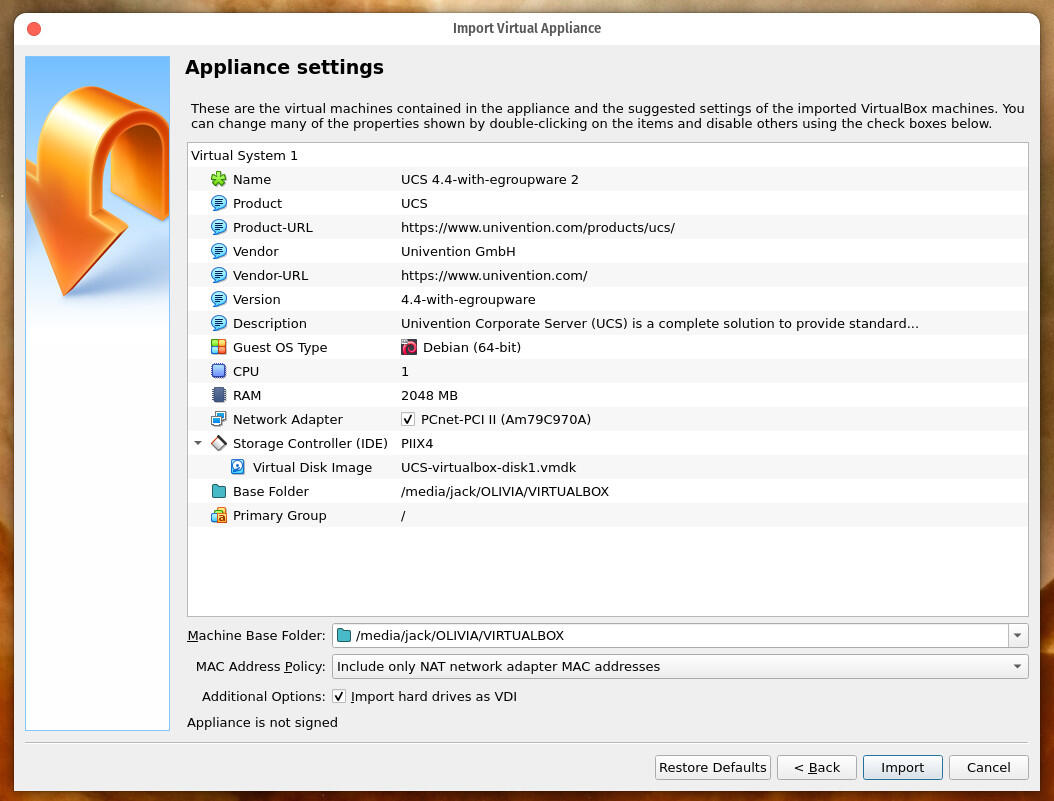
The default settings are applied to the eGroupware virtual machine.
You can adjust certain settings, such as the allotted memory for the VM. Make any necessary changes and click Import. Eventually, you’ll land on the first of the eGroupware installer screens, where you select your language and location (Figure B).
Figure B
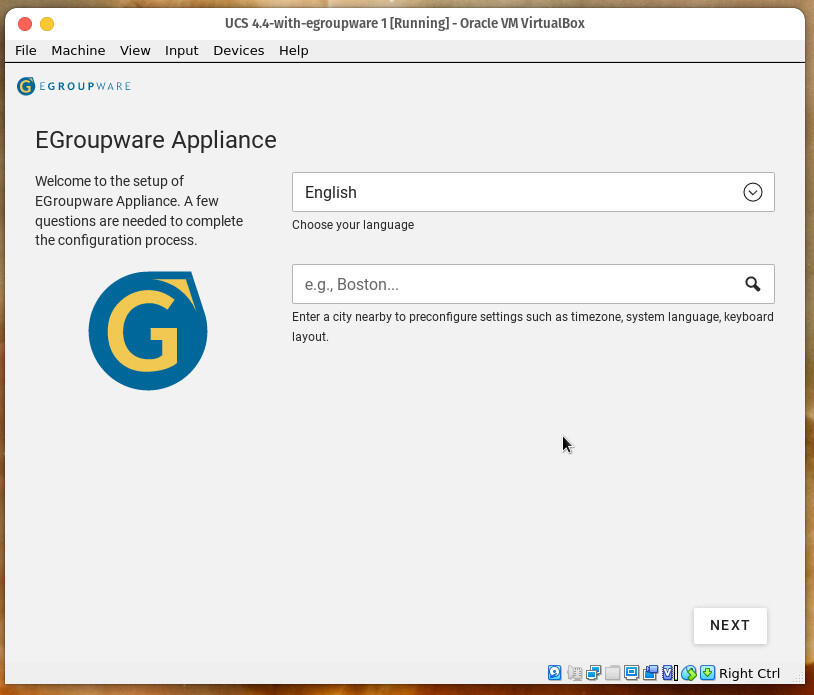
Selecting your language and location for the eGroupware installation.
Fill out that information and click Next. On the next screen, you’ll configure your localization settings (time zone and keyboard layout). After that, it’s time to configure your network (Figure C).
Figure C
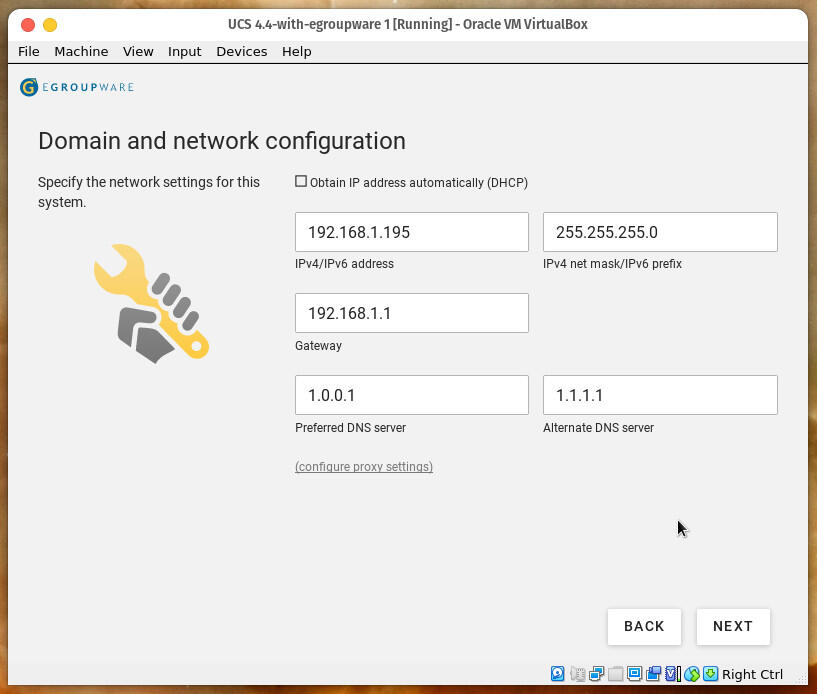
Configuring the network settings for eGroupware.
After the network configuration screen, you’ll configure the domain. In this window, select the option that best suits your needs and click Next (Figure D).
Figure D
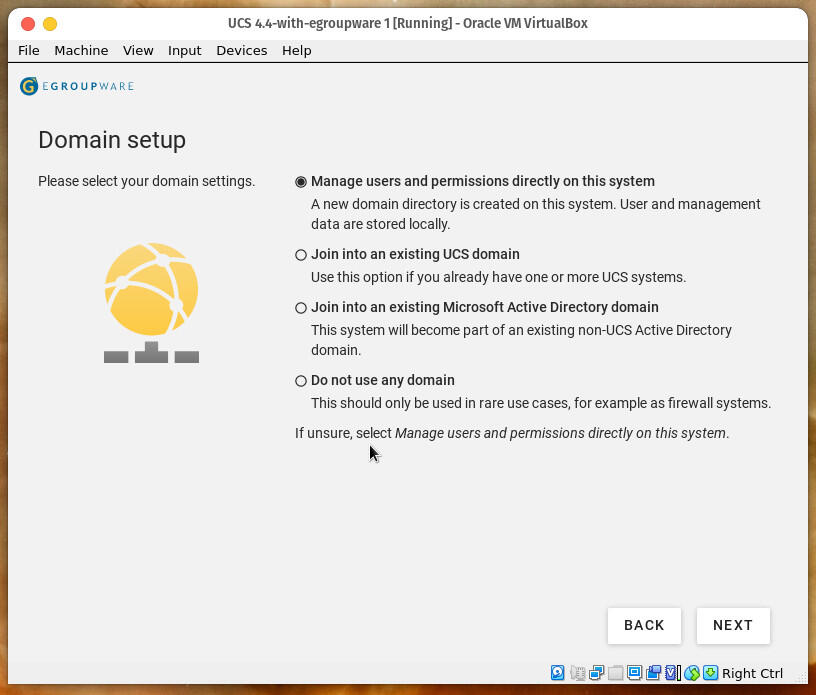
Joining eGroupware to a domain for localized user management.
In the next screen, you’ll create an organization name, add an activation email address (where you’ll be sent a key) and then create a password, which will be used for both the domain Administrator user and the local root user. Once you fill out that information, click Next. The resulting window will display the FQDN of the host. If you already have a domain for this server, type it here and click Next (Figure E).
Figure E
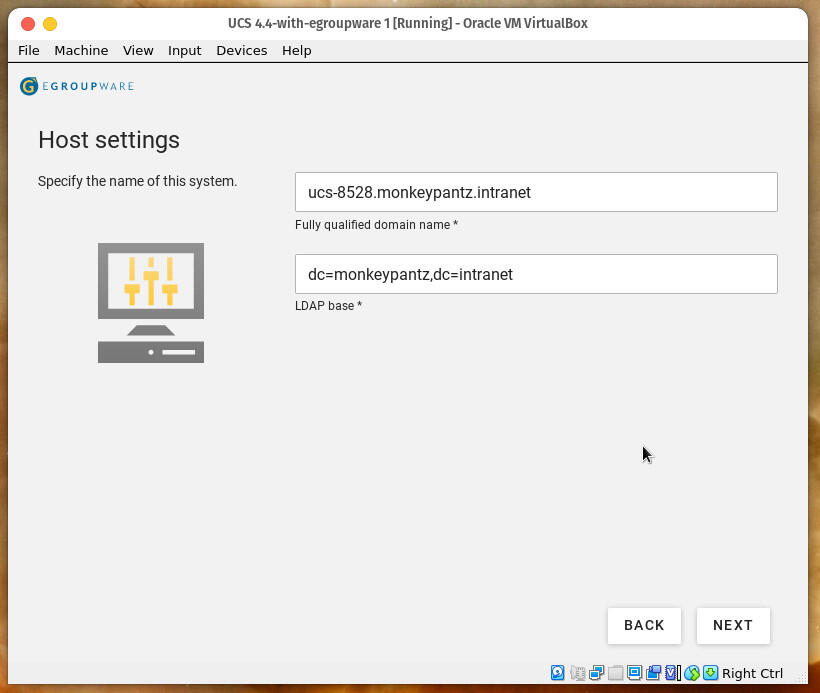
Setting the FQDN for eGroupware.
Finally, you’ll click Configure System and the installation will begin. This is where the majority of the time will be spent, as eGroupware will update all necessary components. When this completes, you’ll be prompted (from the terminal) where to proceed, which will be a link as well as the credentials necessary to further configure the UCS deployment. You don’t necessarily need to take care of such configuration, but you should certainly save those credentials for later.
Instead, you should point your browser to http://SERVER/egroupware/login.php (where SERVER is either the IP address or domain of your server). Log in with the username Administrator and the password you created during the installation. You will then find yourself on the main eGroupware page, where you can further customize your deployment (Figure F).
Figure F
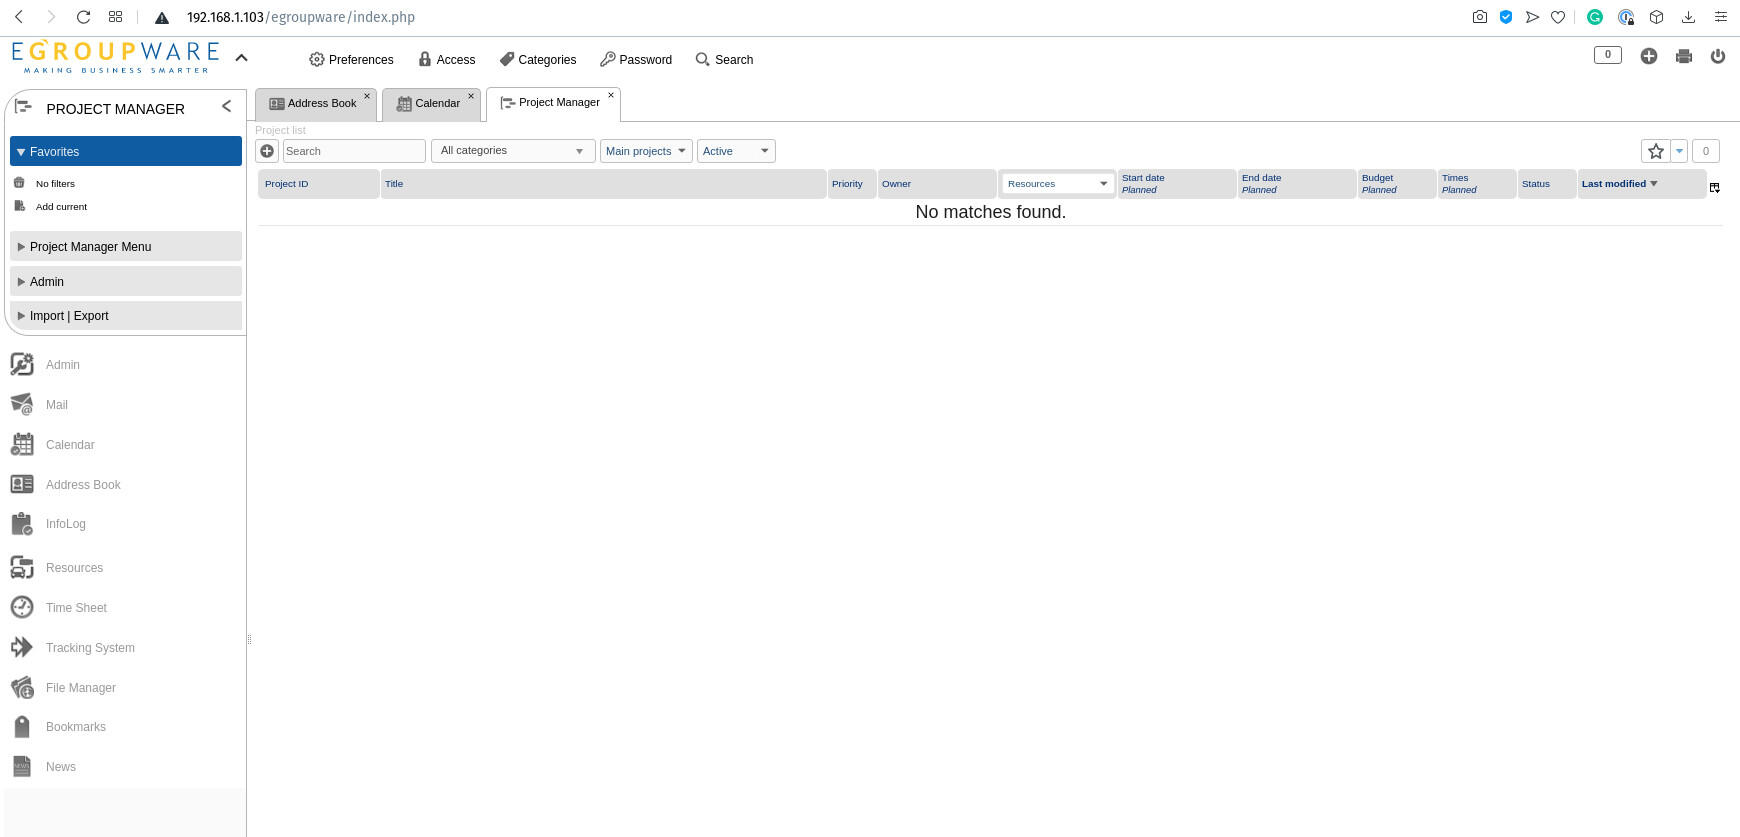
The main eGroupware page is ready to serve.
And that’s all there is to deploying eGroupware as a virtual instance with VirtualBox. This groupware suite is perfectly capable of serving the needs of small businesses. The one thing you must remember that it’s not is a replacement for the Google suite of tools, as eGroupware doesn’t include an office suite.
Subscribe to TechRepublic’s How To Make Tech Work on YouTube for all the latest tech advice for business pros from Jack Wallen.

Data Center Trends Newsletter
DevOps, virtualization, the hybrid cloud, storage, and operational efficiency are just some of the data center topics we’ll highlight.
Delivered Mondays and Wednesdays
Sign up today
Also see
For all the latest Technology News Click Here
For the latest news and updates, follow us on Google News.